Homemade Mondays: Lemon Balm Tincture. I mean Extract. I mean Bitters.

Happy discovery of the week: tictures, extracts, and bitters, are all very close to the same thing. They have different names depending on the application. This is good news, and makes for a wider range of options in certain areas. Obviously you would want to be careful and always do research before using an herbal tincture as a bitter or extract to make sure it’s safe (White willow bark tincture, for example, is lovely for headaches but is not recommended during pregnancy as it contains salicylates similar to those in aspirin which is not really recommended for pregnant women).

I’ll share the recipe for Lemon Balm tincture, because I have some bottled up now, but you can do many different herbal tinctures this way. In my house right now I have tinctures of elderberry, peppermint, white willow bark, and lavender.

Note: Lemon balm may interact with some SSRI’s and other anti-depressants or anti-anxiety medications. Please check with your health care provider and/or do your research to make sure it’s safe before taking a medicinal dose of any herb.
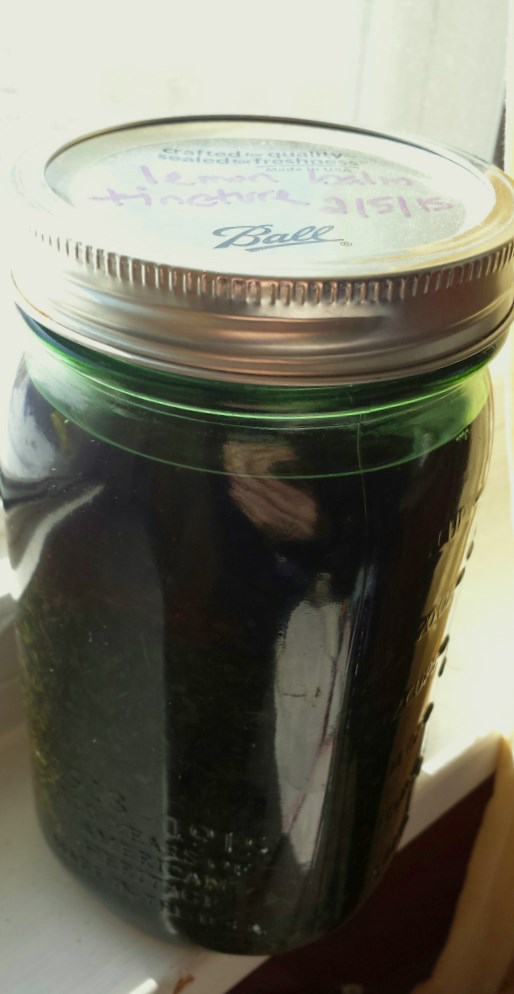
wpid-20150223_120816

Lemon Balm Tincture

Ingredients:

Dried lemon balm

pint or quart sized mason jar with a tight fitting lid

vodka, everclear, or other high-proof alcohol (some sources said 40% is enough, other sources said higher, still others said higher proof is necessary but added water…I have had good luck with 80 proof vodka)

Method:

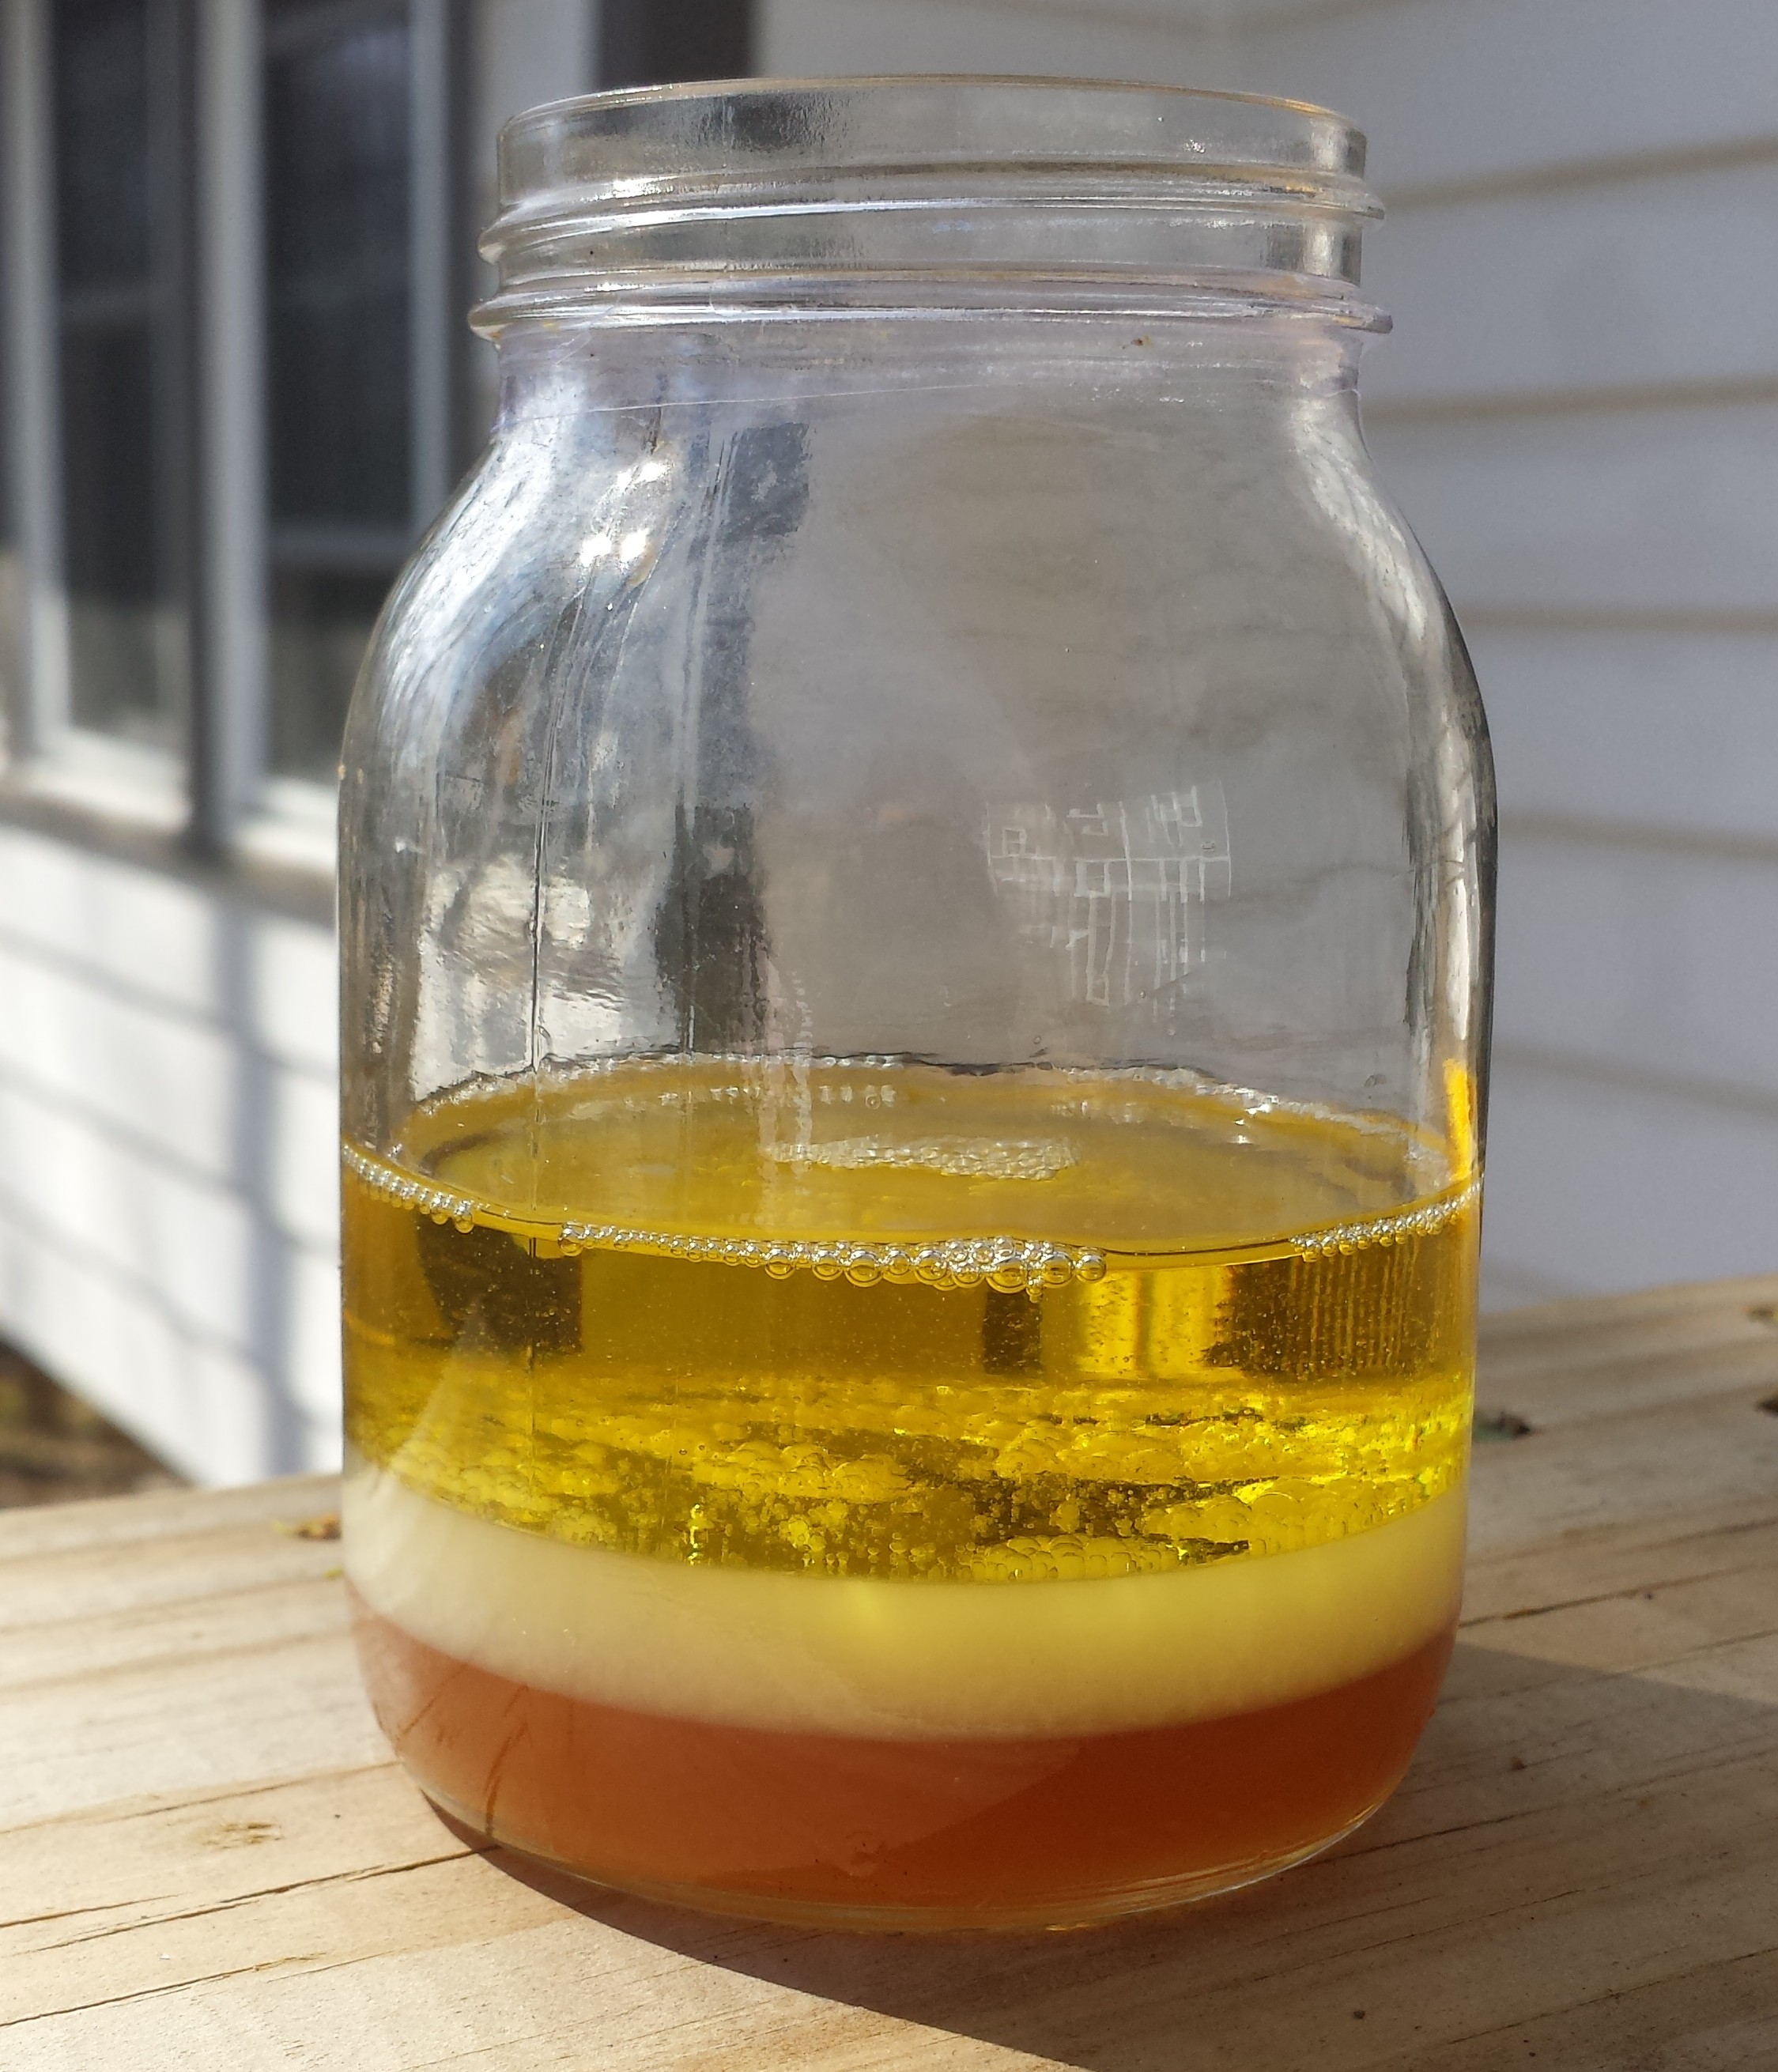
Fill the jar no more than 2/3 of the way with dried lemon balm (if using fresh herbs, consider letting them wilt for a while first–you fit more in the jar that way and will get a stronger product). Cover with alcohol by at least 2 inches. Shake well, and leave sitting in a warm bright place. Check the next day to see if the liquid is still covering the herbs. If not, add more liquid. Shake about once a day. After 4-6 weeks, strain all liquid into a bowl using cheesecloth, a wire mesh strainer, a nutmilk bag, or something similar (press herbs to get out as much as possible), bottle up, and use just as you would the tiny bottles that are very expensive at a health food store. There are many schools of thought about tincture dosing, and I don’t claim to be an expert so please do your own research. For many tinctures, a “standard suggested adult dosage for tinctures is 2 droppersful two to three times a day.” If you’re going for maximum quick absorption of the herb, put it under your tongue. For maximum flavor, add it to a hot tea. For maximum old-timey fun, add it to a hot toddy 😉

Homemade Mondays: Drinking Chocolate

I first learned about drinking chocolate at Mount Vernon* during a family trip there.

One of the things I missed when we had to give up dairy was hot cocoa (I know you can use almond milk but it’s really just not the same). But while this is markedly different, it’s delicious enough that it fills the empty chocolatey space nicely. And if dairy is your thing, you can add a bit at the end for some extra creaminess.

Drinking Chocolate

Serves 2-3

Ingredients and supplies:

1/3 c sugar

1/3 c cocoa powder

dash salt

add-ins of your choice (see below)

wide mouth quart jar

wand blender (You could probably do this in a regular blender but we like the wand blender)

Method:

Combine sugar, cocoa powder, and salt in mason jar. Add boiled water to make about 1 1/2 or 2 cups altogether, then blend until well combined. stream in add-ins with the blender going. Taste, adjust flavorings and add-ins as needed, and serve.

Add-ins

Extract of your choice: standards include vanilla, almond, mint (a very little bit of mint goes a long way)

Heavy cream or Half and half

Whiskey, rum, or flavored liqueur of your choice, like kalhua

Candy cane

Whipped cream (use this as a topping, not streamed in, obviously)

drinking chocolate

*Mount Vernon is a peculiar mix of confronting the facts of slavery and standard white privilege denial. You can go and tour the slave quarters and read about what life was like for the three hundred and nineteen slaves living there at the time of George Washington’s death, and while it doesn’t go into too many details, they don’t hide the fact that these were, in fact, people who were owned. And yet, when we reached the end of our tour, there was a demonstration of how to make drinking chocolate “like Martha Washington herself would have made it.” Really? Ground the cacao pods into powder by herself, did she? Still, this stuff is delicious, and these days as long as you get fair or direct trade chocolate, you can even be sure no one has to be enslaved for you to drink it. So that’s nice.

We get ours from Costco right now, because I found Rodelle cocoa powder there and found this post on the internet about it (granted, it’s anecdotal and secondhand information but I chose to go with it for now; there’s also this on their website if you’re interested in reading further):

“Elise Neufeld says:

OCTOBER 3, 2013 AT 2:44 PM

Being concerned about cocoa powder, I contacted the company which supplies cocoa powder to our local Costco (Rodelle brand), and was shocked to get an email back within a few hours from their president. I was so impressed with his answer that I reproduced it below:

“It is very important to our company that our vanilla and cocoa are sustainably and socially sourced. Myself and our procurement team routinely visit our growing regions to personally audit our exporters and farming cooperatives for such issues you have mentioned. I was a Peace Corps volunteer many years ago and I learned at an early age how important it is that all parties are treated fairly throughout the supply chain especially when it comes to commodity food products in developing countries. We do source a number of “Fair Trade” products but I do feel that a lot still needs to be ironed out when it comes to the “Fair Trade” certification. Therefore we have established our own criteria based on working with transparent cooperatives supporting them with social programs and paying premium prices to the farmers. I am proud to say we have impacted over 15,000 farmers for the better by having such strict procedures in place. We do have more information on our website regarding our programs. ”

It’s good to know that even some of the bigger brands are committed to ethical sourcing!”

Homemade Mondays: Kail Brose

This is not my recipe, but it it very, very easy, it’s good for what ails you, it doesn’t have a long ingredient list, and it’s what I’m making for dinner tonight.

I’ve found other recipes but the one I’ve linked to is the first one I found so I’ll share that one. Lots of room for experimentation and using what you have. It’s also in The Scots Kitchen by F. Marian MacNeill, with a few variations.

Kail Brose

wpid-20141013_174500.jpg

Homemade Mondays: Cashew Cheese With Roasted Pepper and Onion

As we are still mostly dairy free around here, I’m always on the lookout for things that taste creamy. I’ve served this at several events and it’s always a big hit. This is adapted from a recipe from Handmade In the Present Moment, which is a delicious raw food (also sometimes called “sun food”) restaurant near my aunt and uncle’s home in St. Augustine, Florida. Obviously, with the addition of roasted peppers and onions, it becomes no longer raw food. We think that it’s worth it because ROASTED PEPPERS AND ONIONS. Yum. But once you get the basic idea of cashew based cheeses down, there are endless variations and room for creativity to flavor this cheese-like food (but not in a Velveeta, “processed cheese food” sort of way) to suit your taste and serving needs.


Cashew Cheese With Roasted Pepper and Onion

Ingredients:

1 pepper, washed, halved, cored and seeded. (red, yellow, or orange…dealer’s choice)

1 medium onion, peeled and halved.

1 1/2 C cashews, soaked for 2 hours in lukewarm water, or overnight in the refrigerator

2 cloves garlic

2 tbsp nutritional yeast

2 tbsp olive, sesame, avocado, or other oil of your choice

2 tbsp water

1 tbsp soy sauce

1 tbsp maple syrup, honey, agave, or other sweetener of your choice

1/2 tbsp lemon or lime juice

salt, to taste

hot sauce, to taste, if desired


Method:

Place onion and pepper in a baking dish and roast at around 350 degrees F for half an hour or so, until the edges begin to turn black. After these come out of the oven, place the peppers immediately into an airtight container of some kind, or the whole thing into a paper bag big enough close around the whole dish. Leave it for at least five minutes, to allow the skins to loosen. They should slip off easily, although you might have to peel them a bit in some spots. Discard skins.

After soaking, drain cashews and rinse until the water runs clear.

Place all ingredients in a blender and blend for about five minutes until smooth and creamy.


My favorite ways to serve this so far are:

-warm with pieces of bread

-warmed with hot sauce and pieces of chicken, dairy-free buffalo style

-cooked up like grilled cheese on a sandwich- I haven’t tried this yet but I have friends who make cashew cheese and look forward to trying it as we approach soup season here in Cleveland.

-as a serving garnish for pasta or risotto

-cold, on creamy vegetable curry soups

-cold, as a vegan sour cream substitute with other taco toppings on Vegan Taco Soup (or, ahem, chorizo based; make your own food choices and love them, people!)

wpid-storageemulated0DCIMCamera2014-09-15-09.13.45.jpg.jpg

Homemade Mondays: Jodie’s Vegan Chocolate Layer Cake

My friend Jodie surprised me with this cake for my birthday a couple of weeks ago. It was super delicious, so I asked her to share her recipe here. Thanks for guest posting, Jodie!


Vegan Chocolate Layer Cake

This recipe was adapted from a recipe I found online at Food52.com. I have made this cake 4 times now, and have found what I believe to be the winning combination. Really, it is hard to go wrong eating anything covered in chocolate ganache. I am not a vegan, but I eat and cook a lot of vegan food. My family, especially my mom, is hard on me when it comes to yummy baked goods. I have been accused of not making my sweets with enough butter and sugar. But this cake got rave reviews, and my mom ASKED me to make it for a holiday party. She doesn’t know it’s vegan. This is my claim to fame and super sweet victory.

Cake:
350 / 10″ springform pan (lightly greased) {the original recipe calls for 8″ or 9″ which will change the baking time and thickness of cake. I used what I had, but liked it better because I also added more layers of filling and the wider, thinner cake worked well for that}
Wet Ingredients:
– 2 tbsp apple cider vinegar added to 2 c. almond milk (or other nondairy milk) and mix until frothy
– 2/3 c. olive oil
– 2 tsp vanilla extract
– 1 3/4 c. granulated sugar (mix until dissolved)
Dry Ingredients:
– 3 c. All Purpose flour
– 2/3 c. cocoa powder (sifted)
– 2 tsp baking soda
– 3/4 tsp sea salt, or 1 tsp table salt
Add the wet ingredients to the dry ingredients in three batches until just combined. Mix with a spatula or a mixer on low setting. Pour batter into the two pans and bake for 25 min. or until a toothpick comes out clean. Let it cool until it can be easily removed from the pan. Let the cake cool completely before filling and frosting.
Ganache:
– 12 ounces of semi-sweet vegan chocolate chips
– 1 tsp vanilla extract
– 1 c. coconut milk
– 4 tbsp maple syrup
– pinch of salt
In a bowl add chocolate chips and vanilla. Set aside. On the stove top in a small pot add coconut milk, maple syrup, and salt over medium heat. Warm until it comes to a gentle boil. Take off heat and immediately pour over chocolate chips. Mix with a spoon until ganache is glossy and smooth. Let it cool to room temperature. (If I am in a rush, I have put it in the freezer to chill it faster. If you do this, don’t forget about it – it hardens fast!)
Filling:
– 15 oz can of pumpkin puree
– 1/2 c. cocoa powder (sifted)
– 1/2 c. maple syrup
– 1/4 c. plus 1 tbsp almond butter
–  1/2 tsp of sea salt, or 3/4 tsp table salt
–  1 tsp vanilla extract
– {1 c. chocolate ganache to be added when it reaches room temperature}
Mix all ingredients except the ganache in a food processor or with a hand mixer until smooth. Put in the fridge so it can set some and the flavors can come together. If you are a finger dipper, and you know you are, don’t judge this filling until it has had a chance to set and after the ganache has been added.) Once the ganache as room temp., take the filling out of the fridge and add 1 c. of the ganache. Process until smooth.
Time to layer!!
bottom cake, filling, top cake, ganache all over top and sides. (you may have extra filling left over to dip graham crackers in, depending how thick you make it)
or
bottom cake, filling, ganache, top cake, filling, ganache over top and sides (there will be no left over filling and you may find you need to make another batch of ganache)
Set the cake in the fridge to set. Bring to room temp to serve. Store in the fridge.
Enjoy the best chocolate cake ever!

Homemade Mondays: Blackberry Lemonade and Blackberry Lemon martini

Yes, I know. It’s Thursday, not Monday. It’s almost Mother’s Day. Humor me. Plus, this is really good. And it’s fun to have a grown-up version and a kids’ version.

This is meant to be made up in smaller batches, for just a few people. For party lemonade (or just for less work), here is the recipe for lemonade concentrate to keep on hand.

blackberry lemonade

Blackberry Lemon Martini

Ingredients:

1 part lemon juice

3 parts maple syrup

3 parts vodka

a few frozen blackberries, to taste

some ice

some lavender bitters, if you’re feeling extra fancy

Method:

Combine the lemon juice, maple syrup, vodka, blackberries, and some ice in a cocktail shaker (a wide mouth mason jar makes an excellent substitute if you don’t have a shaker). The more blackberries you add, and the longer you shake, the darker it will be. Shake for half a minute or so, then taste a bit to see if you need to add more lemon or maple syrup. Adjust amounts and shake again if necessary, or pour into a fun glass and top with lavender bitters if that’s your thing.

Blackberry Lemonade

Ingredients:

1 part lemon juice

1 part maple syrup

a few frozen blackberries, to taste

some ice

water


Method:

Combine the lemon juice, maple syrup, blackberries, and some ice in a cocktail shaker (a wide mouth mason jar makes an excellent substitute if you don’t have a shaker). The more blackberries you add, and the longer you shake, the darker it will be. Shake for half a minute or so, then fill the rest of the way with water. Ready to serve! This also works really well with other berries, mint leaves, etc.

Homemade Mondays: Lemon Sesame Salad Dressing (and science experiment)

I really like homeschooling lessons that involve food. So for our salad the other night, we mixed up this simple salad dressing together and discussed how the different layers of liquid had different densities, and what emulsions are (I only gave the very basic description that oil and water are not really friends and that when you emulsify them it’s like making them stay together even though they don’t want to–cut me some slack! I don’t have a degree in science. My goal in homeschooling isn’t to be an expert in everything; because who can know all the things? The point is to rouse kids’ curiousity about stuff and then google the answers to their questions with them!).

This was easy, fun, and delicious.


Lemon Sesame Salad Dressing and Science Experiment

Ingredients:

1 part lemon juice

1 part honey, agave, maple syrup, sugar, etc.

2 parts sesame oil (you could easily substitute avocado, olive, etc.)


Method:

Combine all ingredients in a clear glass bottle. If you have little kids around you (or even if you don’t; whatever) take a minute to notice which liquid is where…the least dense (oil) will be on top, and the most dense (honey) on the bottom! Food is interesting!

Oh, then tightly lid and shake well to combine.

I served this over a romaine salad with sesame seeds and it was yummy.

lemon sesame salad

Homemade Mondays: Vegan Aloo Mash with Chapates

A few years ago we met a lovely lady who taught us how to prepare and enjoy a few Indian dishes. After picking up a taste for it, I started looking into more fun meals that would be easy to prepare and fun to eat. Somehow I came across a recipe for something calling itself “Aloo Bhartha” which my family loved and quickly became a staple. Except that in Hindi, that actually means “Potato Eggplant”. Since there is no eggplant involved, we’ve renamed it (because it’s still delicious, whatever it is and however much it’s not a traditional Indian dish). Also, if you can or will eat butter I highly recommend cooking your chapates in ghee instead of coconut oil like me. Yumm…..butter……

Lastly, this is a good thing to serve with a salad or some other kind of vegetable because otherwise it’s kind of a starchy meal.

Vegan Aloo Mash

Ingredients:

2 smallish potatoes per person, well washed

1 medium onion per 4 people, peeled and chopped

a little oil for the pan (avocado, coconut, or your favorite cooking oil)

whole cumin seeds, 1-2 tsp (to taste)

whole yellow or black mustard seeds 1-2 tsp (to taste)

turmeric (to taste)

salt (to taste)

Method:

Roughly chop the potatoes. Boil as you would for mashed potatoes, until a fork goes easily through them. No need to peel, as long as they’re clean. I cut out bad spots and leave the peels because they are a good source of iron!

Once the potatoes are done, turn them off and set them aside. Heat oil over medium heat in a large fry pan for a minute. Add onions, cumin, and mustard seeds. Cook, stirring constantly, until the seeds begin to crackle a bit. Have a potato masher handy, if you have one (if not, you can mash the potatoes in whatever way you usually do…like with a mixer or whatever). Add the potatoes a little at a time, mashing them up well with the spices and onions before adding more. Add turmeric and salt to taste, and water for texture as you go. You might have to try some to get the flavoring just right. 😉

Chapates

Ingredients:

(sourdough starter)

flour (I use spelt, but whatever all-purpose-ey sort of flour you use will be fine)

water

salt

coconut oil (or ghee)

Method:

Start with sourdough starter if you have it, or a cup of water if you don’t. Add flour a little at a time until you have a workable dough. If your dough gets too dry, add a little water and keep mixing. These roll out on a floured surface much like flour tortillas. Roll them as thin and round as you can while keeping them easy to pick up (mine are often not very round).

Heat a griddle or large fry pan over medium/high heat. Put a chapate on, then put about 1/2-1 teaspoon of coconut oil in the center. Roll out the next chapate while this one is cooking. Once there are small brown spots on the bottom, flip and cook for 30 seconds or so on the other side. Transfer to a serving plate and put the new chapate on, and so on and so forth. If they are cooking too fast for you to keep up, turn the heat down a bit.

Serve chapates and aloo mash immediately with hot sauce or chutneys of your choice, fresh coriander (cilantro), or just plain.

To reheat leftovers, add a little water to them and stir until they are as hot as you like and have the right texture.

wpid-20140317_095953.jpg

Homemade Mondays: Chocolate Syrup Hack

Whether you’re mid-party and someone wants a chocolate drink, or just by yourself and don’t feel like going to the grocery, it’s convenient sometimes to be able to whip up something quickly to add a little extra fun. Some of my favorite homemade staples started to be homemade because one day it seemed like too much work to get to the store. This particular chocolate syrup recipe took me only a few minutes of stirring.

Chocolate Syrup

Ingredients:

Hot Cocoa Mix

Water

optional add-ins: vanilla or almond extract, sea salt to taste, other flavors you might like. But the point is to keep this simple, right? Chocolate syrup is painfully simple to make and customize to your own taste.

Method:

Pour desired amount of hot cocoa mix into a small saucepan. Add only a little bit of water (enough that you can mix it into a medium-thick paste) and cook over low to medium heat. Stir with a wisk and make sure it doesn’t burn to the sides. It doesn’t take long but you do have to watch it pretty closely. Once all the sugar has dissolved, the syrup is very smooth, slightly thinner than you would like, and has the flavor you prefer (add more sugar if it’s too bitter, or sift in a bit more cocoa powder if it’s not chocolatey enough) remove from the heat. Allow to cool, and use immediately or store tightly covered in the fridge.

serving idea: mix in some peanut butter and serve as a fondue with bananas, graham crackers, marshmallows, etc.

wpid-20140301_123439.jpg

Homemade Mondays: Grenadine!

**If you just want the recipe then scroll down a bit. This is a blog, after all, and so it includes my musings.**

So, I have this group of mamas that has started getting together semi-regularly. We call it “the Mama Speakeasy”. The first time we had it, I put a sign on my front door that looked like this:

no admittance

Which was funny and made us feel like we were doing something sneaky and fun. And we were. Ironically, the day of the party this sign did not deter the AT&T guy from accosting J (again! Dear AT&T: PLEASE LEAVE US ALONE. WE DO NOT WANT U-VERSE. Coming to our house several times a week in the summer and sending us things in the mail is not convincing. Furthermore, trying to engage us in long and fruitless conversation with the door open when it’s well below freezing doesn’t help your case.)

But for this month’s Mama Speakeasy, and moving forward, I wanted to find something that reflected what I was trying to accomplish a little more accurately, while still preserving my nerd cred. So we landed here:

speak friend and enter

I want people to be able to speak freely and in safety about their lives in an environment that is nonjudgmental and encouraging. And sometimes involves martinis. (In case you are nerdy too and wondering, I did not actually make people say “mellon” before they could come into my house. I’m not THAT bad.)

Anyhow, in the quest for crunchy or “real food” drink options, a friend and I were looking for grenadine because pink drinks are fun. And the first one I found had these types of ingredients:

Ingredients: HIGH FRUCTOSE CORN SYRUP, WATER, CITRIC ACID, SODIUM CITRATE, SODIUM BENZOATE (PRESERVATIVE), RED 40, NATURAL AND ARTIFICIAL FLAVORS, BLUE 1

Um, no thank you.

We did manage to find one that seemed to contain food, but when I looked at the ingredients I realized it was basically pomegranate simple syrup. Since we were planning for a fancy party, I already had pomegranate juice at home, so I decided to try to figure it out myself. It has to boil down for a while, but there’s very little (read: about 30 seconds) actual work involved in this and it makes an impressive party addition because it’s one of those things not everyone might think to make from scratch.

Homemade Grenadine

Ingredients:

2 cups of pomegranate juice

1/4-1/2 cup of real maple syrup

a little splash of lemon juice

Method:

Combine pomegranate juice and maple syrup in a wide sauce pan. Bring to a simmer and allow to reduce, stirring periodically, until it reaches your preferred intensity of flavor. If it’s too sweet, add a little juice (pomegranate juice is tart!). If it’s too tart, add some more maple syrup. When you are happy with it (mine reduced over low heat for about an hour), remove from heat, pour into a cute bottle if you have one (or whatever container you have), cover, and use or refrigerate.

You could also make this with regular sugar, or honey, or another natural sweetener. But my maple syrup version was really good. Just saying.

This weekend my kids and I talked about Shirley Temple Black and drank homemade shirley temples. Good times. 

wpid-20140301_134517.jpg